info-beamer hosted OS Version 10 is almost finished. If you want you can test the new version already in testing channel. See this post on how to upgrade your device to the testing version. Note that you should only test this on device where it’s acceptable to have display downtime. If you want stable device, always use the stable channel! You can of course switch back to stable at any time if you want.
Feature Preview
You can try out all of the following features right now!
Editing device configuration from the dashboard
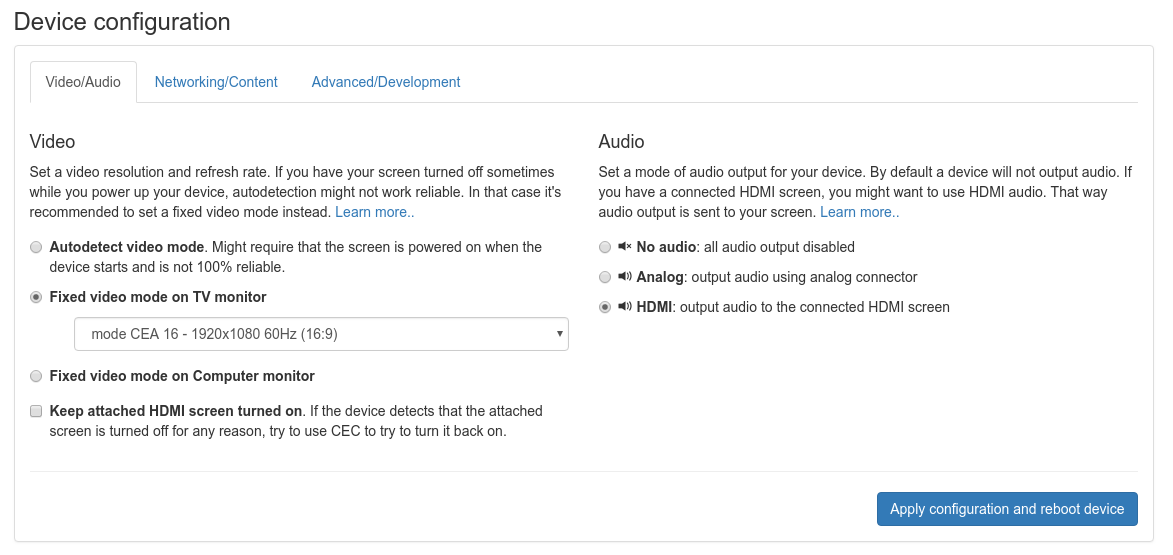
Previously you all configuration setting changes required you to edit a file on the Pis SD card. This is no a thing of the past. You can now edit almost all config setting in a shiny new UI on each device page. Change WiFi setting? Switch Audio output from analog to HDMI? No problem. The is broken down into 3 individual pages. Here is the Audio/Video settings page. You can set a fixed video mode and configure audio:
Next is the Networking/Content tab. Switch from static to automatic IP configuration, or set your WiFi. You can even scan the WiFi networks near your devices and select them. All from the dashboard website.

Finally there’s a development tab with advanced settings that are not needed for normal operation. They are useful if you want to develop your own packages or have very special installation environments.
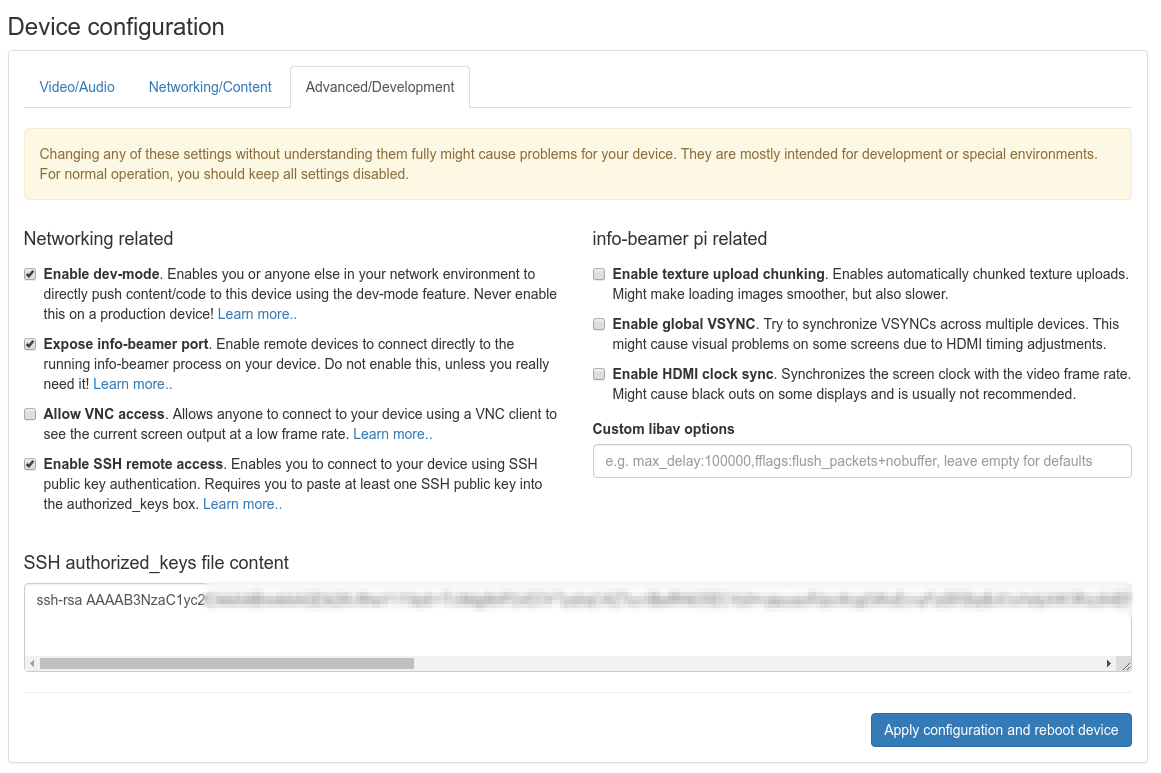
All settings have a Learn more link that references the section in the device configuration documentation. Changing a setting requires a device reboot. When rebooting the device will boot into a freshly installed OS version with the new settings applied. If they don’t work correctly (like you have a typo in your WiFi password) the device will automatically detect this error and revert to the previous version after a few minutes.
More checks for SD card problems
The device will now automatically detect severe SD card problems (like the SD card being locked) and will try to recover from them automatically.
New ffmpeg version
Previously info-beamer OS used the same ffmpeg version as Raspbian. With recent versions, this got a bit too dependency heavy for features that make no sense in info-beamer like loading odd file formats or being able to encode all kinds of video formats which info-beamer has no use for. We’ve now replaced ffmpeg with out own version that is customized for the features that info-beamer actually uses. The result is an almost 5MB reduced size for our install.zip installation file. This means quicker updates and more space for future features. Additionally starting an info-beamer device is now a bit faster as a result.
Added VNC server support
You can now connect enable VNC support. This allows you to connect to your Pi with any VNC client and see in its output in real time. Note that the Pi is too slow to produce a high framerate output. But 2-5 frame/second is probably good enough if you want to do info-beamer development on the road and only have a Pi and Laptop with you. See here how you can enable this feature. Or read on, because we made configuration of your devices a lot easier…
Ensure enough free space for package services
Previously a device tried to free up 512MB of SD card storage space after syncing new content by deleting old cached files. This check is now running every minute to ensure that a package services is almost guaranteed to have 512MB available at all times.
Package instance scoped scratch directories
Previously the directory referenced in $SCRATCHDIR in package services was shared between all services running on a device. This has now changed and each package instance gets its own scratch directory for storing files that might survive reboots. Read more about this in the package service documentation.
Support for GPIO and serial UART access
Packages can now request the permission required for GPIO/serial access. A few demo packages already make use of that:
Content import from USB sticks
If you have an environment with slow uplink and need to assign big video files to your devices, you might now copy those video files on an USB stick and plug that into your Pi. If the USB file import feature is enabled, the Pi will copy all files into its local cache. If you later assign those videos to the Pi, they don’t have to be transferred over the internet. If you also enable Peer-To-Peer, all Pis in your local network can share the already cached assets without downloading them over the internet.
Peer to Peer NTP synchronization
A correct time on all Pis is important for a synced video wall installation. Sometimes your uplink is slow or unreliable. This might result in a badly synced time. If you enable Peer-To-Peer now, it will also open up an NTP on your devices. Using a peer to peer protocol, they will now automatically use each other for better time synchronization. Right now this feature is automatically enable together with P2P. In the final version, this has to be explicitly enabled (of course very comfortably from the web configuration interface!).